Having great chicken broth on hand makes excellent soups and gravies easy.
This method is designed to maximize the flavor and nutritional value of the broth. Using vinegar helps to draw minerals from the bones. The long simmer releases cartilage and minerals into the flavorful liquid.
Because making broth will extract whatever is in the bones, you should start with birds that were not raised on hormones and arsenic-laced feed. It is best to buy from a local farmer with a flock that lives outdoors.
This unsalted broth has many uses. Add salt when using to make soup or other dishes. Use frequently.
Chicken or Poultry Bone Broth
Equipment Recommendations
If you have a gas stove, use a crock pot to make broth, not the stove top.
6.5 qt. oblong slow cooker or large stainless steal or enamel stock pot
Asian-style stainless steel perforated 6” broth spoon
6 -7” mesh broth skimmer
Wide-mouthed canning funnel
Case of quart or pint-sized mason jars for storing broth and soups.
Ingredients
One whole Chicken, or a combination of saved bones with some meaty pieces such as necks, or leg quarters; parts with lots of joints such as wings, necks, and feet . These “odd bits” add gelatin and nutrients, and are recommended.
Filtered water
¼ C wine, rice, or apple cider vinegar (or lemon juice, or ½ C wine)Optional
Good chicken doesn’t need a lot of help to make a wonderful broth, however, I usually add a bay leaf. Other options: onion, or the appropriate spices for an ethnic base.
Instructions
- Place the whole chicken in slow cooker (or in a large heavy pot). Briefly set the pot lid to check that it will rest on the rim of the pot. If the chicken is too big for your pot, remove it and cut the chicken in half along the back and breast bone.
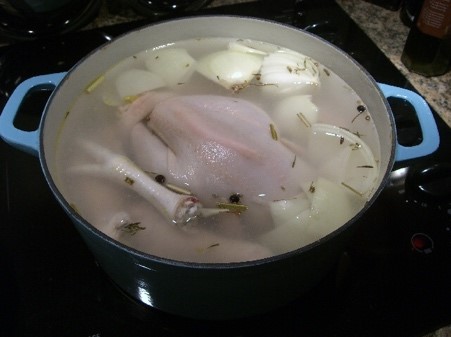
Chicken in the Broth Pot
- Add bay leaf and optional seasonings, as desired.
- Add enough water to cover the chicken, approximately 1-inch below the upper rim of the pot. Avoid over-filling the pot which can create a hazard.
- Add vinegar.
- Cover the pot and set slow-cooker heat to low. Allow to lightly simmer for 4 – 9 hours. Cooking time is not precise, adjust to fit your schedule. Check the heat after about 1½ hours to make sure that the simmer is not too strong. If using an electric stove, check periodically to adjust the heat setting and maintain water level.
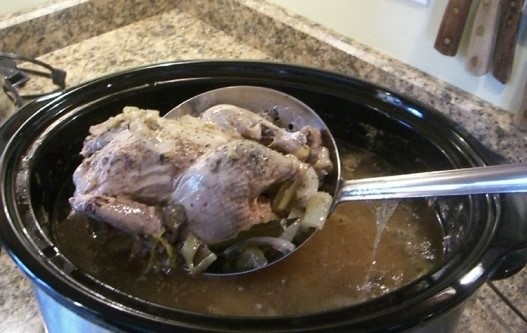
- Set a large stainless steel colander in a large bowl. Lift the chicken out of the broth into the colander using the long-handled pan strainer. The chicken will be falling apart at this stage.

Lifting Cooked Chicken from Broth
- Use tongs and a fork to remove the meat from the bones. Store the meat immediately in the refrigerator for later use in soup or chicken salad. (Use an airtight glass storage container.)
- Return all the bones and cartilage to the broth in the pot, along with the broth that drained through the colander. Add an additional splash (1 tbsp.) vinegar and resume a gentle simmer for an additional 6 – 12 hours, as convenient

Chicken Bones Cooking after Meat is Removed.
- Use the long handle strainer to lift the bones into a large stainless steel colander sitting in a large bowl. Put the liquid from the bowl back in the broth. Discard the bones once they are cool.
- Carefully pour hot broth through a mesh strainer into 3 clean 1-quart canning jars using a metal canning funnel. Seal at once with tight sealing, clean lids.
- Wipe any spills off the outside of the jars. Allow jars to cool for about an hour. Write the date and “chicken broth” on masking tape placed on the lids, transfer to the refrigerator for storage. Note that this is not “canning” – the broth MUST be refrigerated.
- If the broth is very hot when poured into jars it keeps a long time unopened in the refrigerator (six weeks or even more). If the broth is allowed to cool before pouring into jars, or if you open it and only use part of the jar, it will only keep for about 5 -7 days.


Can you freeze the chicken broth?
If you use the technique of putting very hot broth in hot jars and covering them tightly right away, the broth will keep for at least six months in the refrigerator.
I find freezing a much bigger hassle, and for safety (not breaking the jars) you need to use plastic, which I prefer to avoid especially for hot foods. I have sometimes put broth into ice cube trays so I have cubes for deglazing pans or making sauces where just a little broth is needed.
Can I make broth in my Instant Pot?
Yes. That’s how I do it. The Instant Pot “slow cook” function is ideal (though for long broths like beef, you may need to restart it to keep it going long enough).